5x Fruitier Cranberry Sauce

5x Fruitier Cranberry Sauce

  • Servings: 4-5
  • Difficulty: easy
  • Print

A delicious cranberry sauce with 5 different fruits to provide optimal depth of flavor!

Ingredients

  • 2 cups fresh or frozen cranberries
  • 1/2 cup orange juice concentrate
  • 2 ripe pears, diced
  • 1 medium apple, diced
  • 1/3 cup dried cherries
  • 1/4 to 1/3 cup maple syrup (to taste)

Directions

  1. Combine all ingredients in a saucepan and bring to a simmer. Continue to cook uncovered until mixture is thick/desired consistency is reached, about 15-20 minutes. Enjoy hot or cold with the people you love!

Nutrition

Per Serving: 185 calories; 0 g fat; 46 g carbohydrates; 4g fiber; 1 g protein; 0 mg cholesterol; 5 mg sodium.

Simply Perfect Sweet Potato and Broccoli Frittata

Simply Perfect Sweet Potato and Broccoli Frittata

  • Servings: 5
  • Difficulty: easy
  • Print

A simple veggie frittata perfect for the whole family!

Ingredients

  • 3 cups diced sweet potato (about 1/2 inch cubes)
  • 3 cups small broccoli florets
  • 2 Tablespoons grapeseed oil
  • 10 eggs
  • 1/2 cup milk
  • mounded 1/4 teaspoon garlic powder
  • 1.25 cup shredded cheddar cheese or other favorite cheese (goat cheese and feta cheese also work great with this recipe!)
  • salt and pepper to taste

Directions

  1. Preheat the oven to 425 degrees F and line a baking sheet with parchment paper or a silpat mat.
  2. Place broccoli and sweet potato on the lined baking sheet, drizzle with oil, and then sprinkle with salt and pepper. Toss veggies (broccoli and sweet potato separately) with your hands to evenly coat with oil and seasoning.
  3. Spread veggies out into a single layer and bake for 15 minutes.
  4. While veggies are baking, crack eggs into a large bowl and add milk, garlic powder, and salt and pepper to taste. Scramble with a whisk until combined.
  5. When veggies are done baking, remove them from the oven and spray a large frying pan with cooking spray.
  6. Place the sweet potatoes in the frying pan in a single layer. Then place broccoli on top. Pour the scrambled egg mixture over the veggies and top with shredded cheese. Bake for 15 minutes or until the center is set (if you wiggle the pan the center of the frittata should not jiggle!).
  7. Let frittata sit for 5-10 minutes before slicing and serving. Enjoy!

Nutrition

Per Serving: 391 calories; 24 g fat; 8 g saturated fat; 21 g carbohydrates; 2 g fiber; 22 g protein; 462 mg cholesterol; 598 mg sodium.

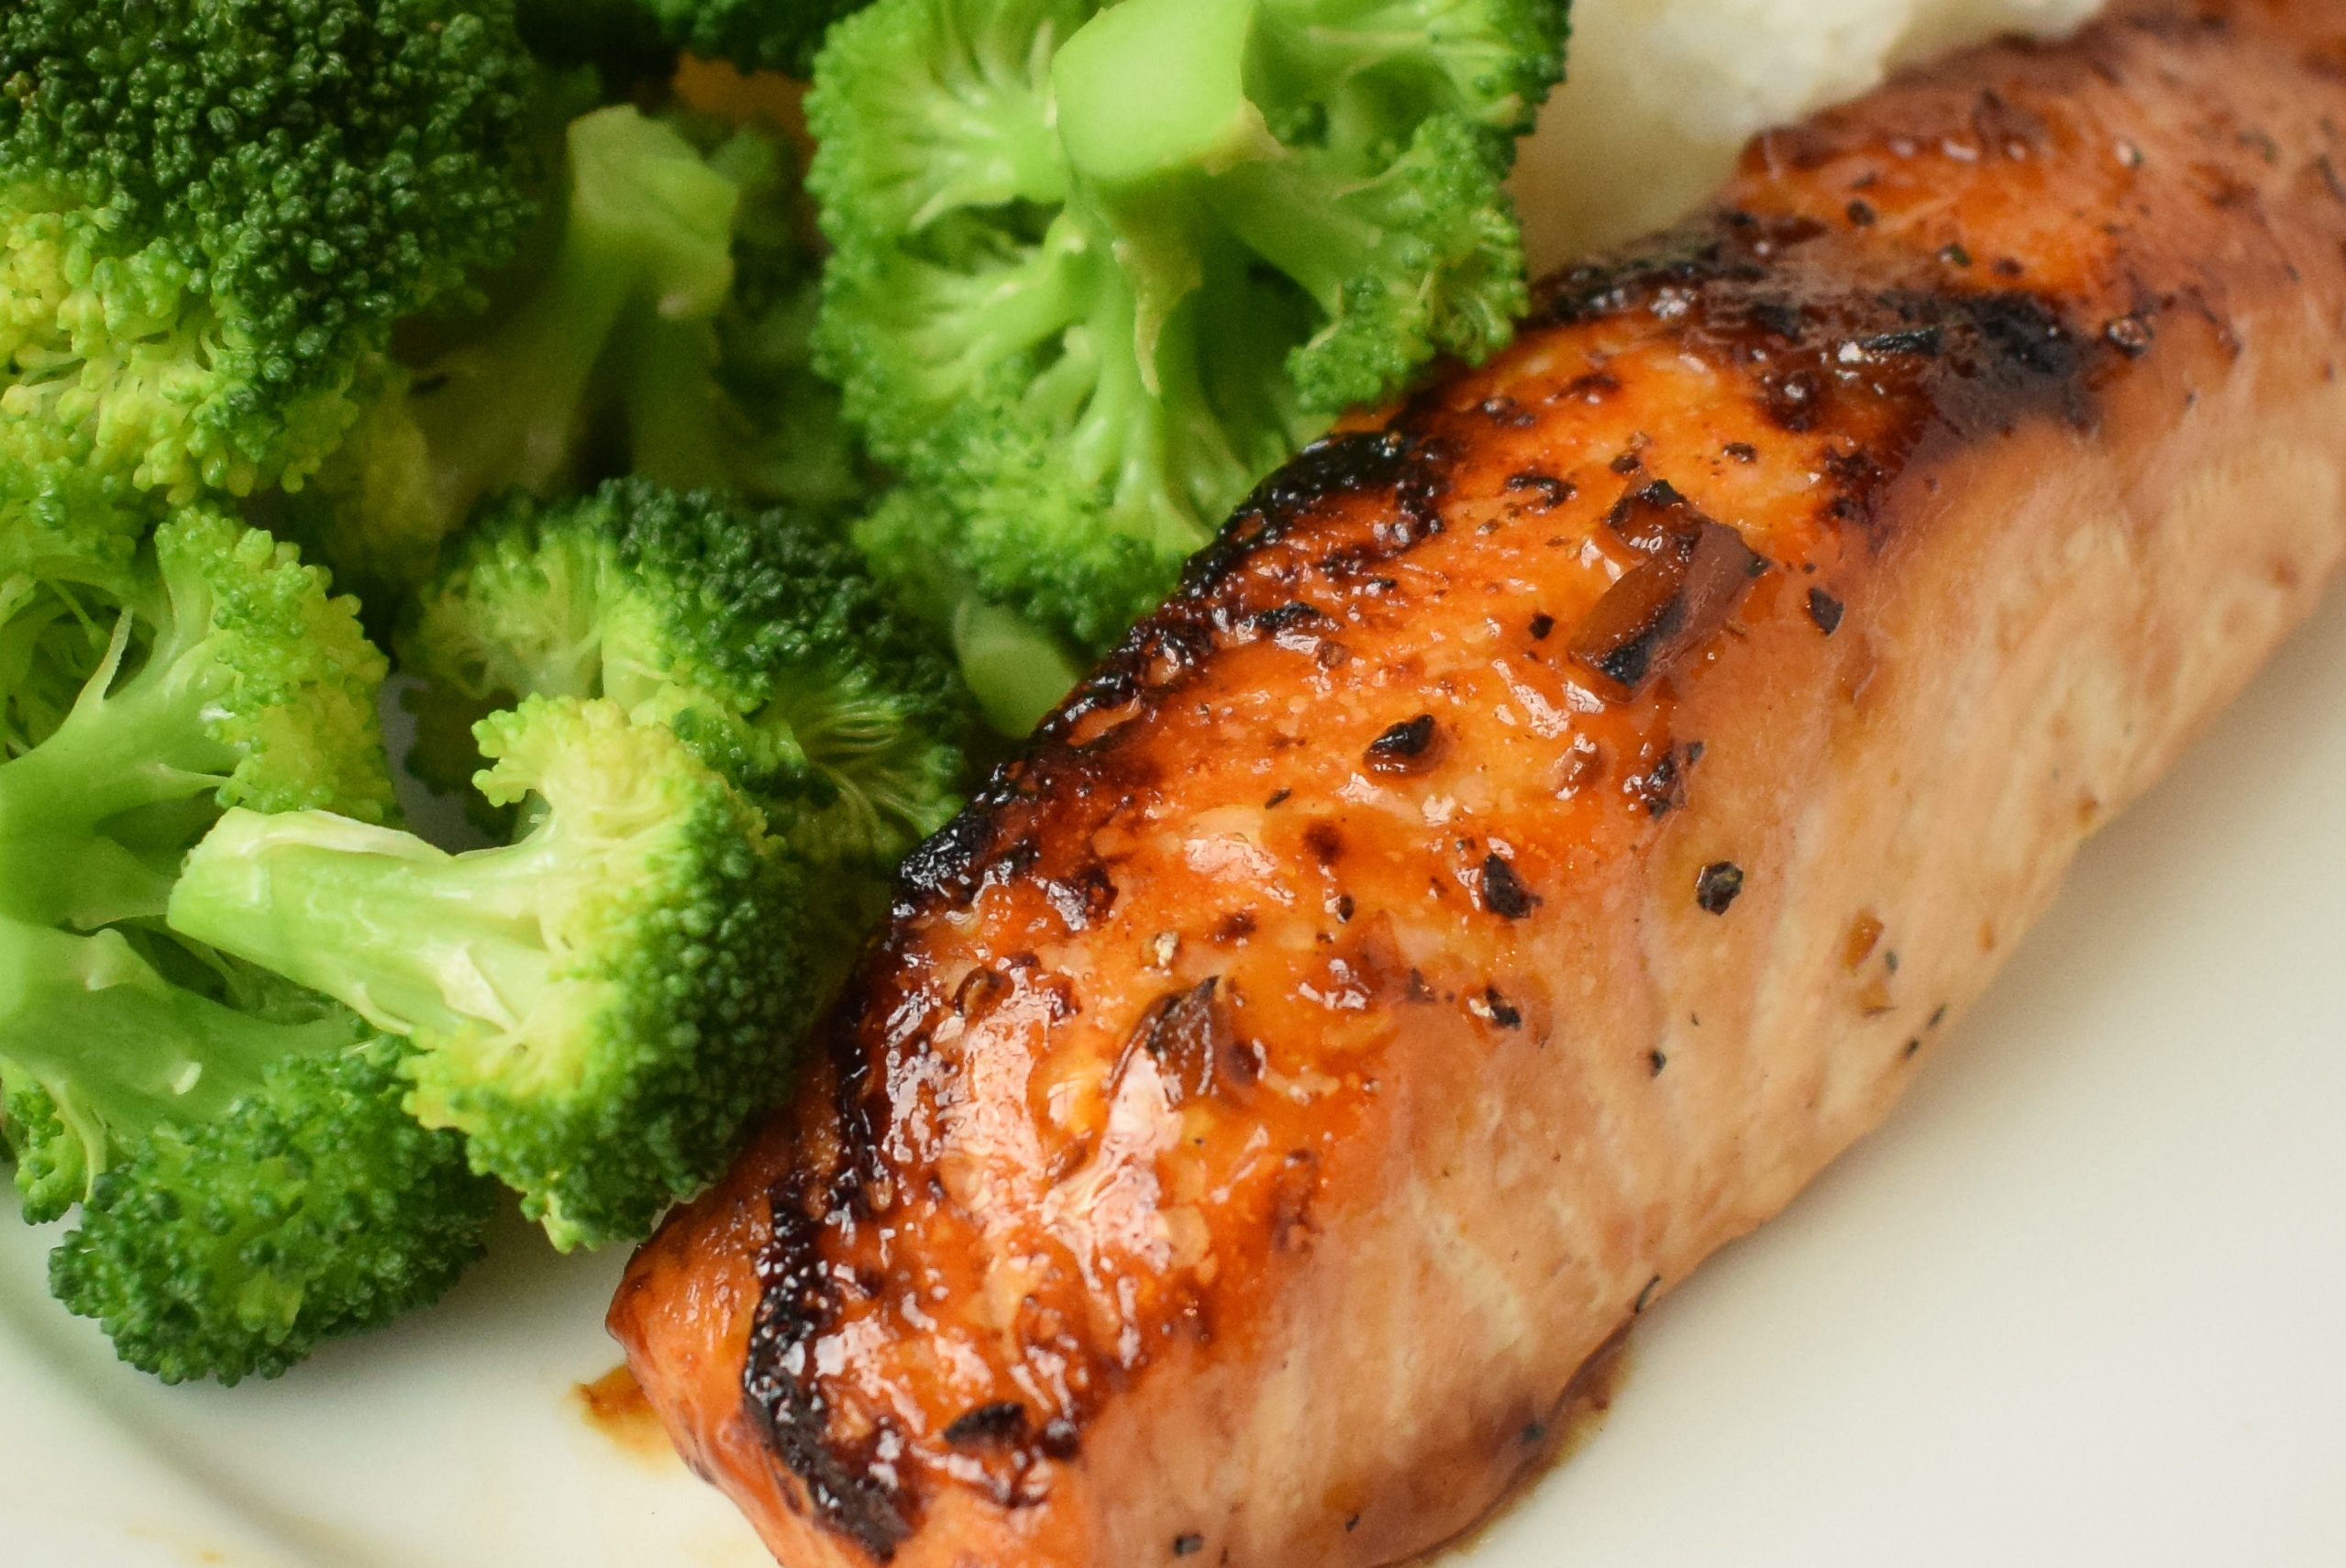
Hot n’ Tangy Orange Salmon

Hot n' Tangy Orange Salmon

  • Servings: 8
  • Difficulty: easy
  • Print

Perfect for a quick weeknight meal!

Ingredients

  • 3 Tablespoons grapeseed or other cooking oil
  • black pepper to taste
  • 10 cloves garlic, chopped
  • 1 cup orange juice
  • 6 Tablespoons soy sauce (gluten free if needed!)
  • 1/2 Tablespoon garlic chili sauce (It’s more of a paste – I like the Huy Fong Foods brand sold at most grocery stores in the Asian section! Sriracha will also work just fine for this recipe)
  • 2 Tablespoons honey
  • 1 cup water
  • 1 Tablespoon cornstarch mixed with 1/4 cup water
  • zest of 1/4 orange (optional, if you like it really orangey!)
  • 8 fillets salmon

Directions

  1. Preheat oven to 400 degrees F. Pat salmon fillets dry with paper towels (if they were previously frozen), lay them on a silpat or parchment lined baking sheet, and brush on a light layer of grapeseed oil. Season with a sprinkle of black pepper.
  2. In a large .frying pan, heat remaining grapeseed oil over medium heat. Add garlic and cook until lightly browned.
  3. Add orange juice to frying pan, turn heat to high, and boil until the volume of juice is only 1/3 to half of what it used to be.
  4. While orange juice is reducing, place salmon fillets in oven and bake for 5 minutes (if fillets are colder than room temperature they will take longer to bake).
  5. Add soy sauce, garlic chili sauce, honey, and water to orange juice mixture.
  6. Add cornstarch-water slurry to sauce mixture, bring to a simmer, and stir until desired thickness is reached.
  7. Taste the sauce, if you desire more orange flavor, add orange zest to your liking.
  8. Spoon half of the sauce over the baked salmon fillets, and then broil for 2 minutes or until salmon is cooked through (if you’re tight on time, you can skip this step, bake the salmon a little longer, and spoon the sauce over the fillets at the dinner table!)
  9. Enjoy with rice and veggies, and spoon remaining sauce over everything!

Nutrition

Per Serving: 335 calories; 18 g fat; 4 g saturated fat; 10 g carbohydrates; 0 g fiber; 7 g sugar; 32 g protein; 66 mg cholesterol; 752 mg sodium.

Cheeseburger Stuffed Peppers

Cheeseburger Stuffed Peppers

  • Servings: 5-6
  • Difficulty: easy
  • Print

A Rochester NY Garbage Plate stuffed inside a bell pepper!

Ingredients

  • 5-6 bell peppers, rinsed
  • 1 lb ground beef (I like to use organic 80/20)
  • ½ large red onion (or 1 small), diced
  • 1½ cups finely diced red potato (about 1-2 potatoes)
  • 1 tsp garlic powder (optional)
  • ½ tsp paprika (optional)
  • ½ tsp chili powder (optional)
  • ½ tsp onion powder (optional)
  • Salt and pepper to taste
  • 1 15 oz can lentils, rinsed and drained
  • 3 Tbsp each of ketchup, mayo, relish, and mustard plus more of any of these to your liking
  • 3/4 cup shredded cheddar cheese

Directions

  1. Preheat oven to 400 degrees F
  2. Slice bell peppers in half lengthwise. Remove stems, seeds, and piths. Place peppers cut side down on a baking sheet lined with parchment paper. Bake at 400 degrees for 20 minutes or until desired doneness is reached.
  3. Line a large plate with a couple of layers of paper towels.
  4. Cook ground beef and red onion together in large sautee pan on medium high heat.
  5. Remove ground beef mixture to paper towel-lined plate to drain excess fat.
  6. Cook diced potato in remaining beef fat (add extra oil if needed) on medium high heat for 7 minutes or until browned.
  7. Add 1/4-1/2 cup water to the pan, cover, and steam potatoes to finish cooking for 5 minutes or until fork tender (you may be able to skip this step if you dice the potatoes finely! I usually aim for cubes about twice the size of a lentil so they really blend in with the ground beef mixture.).
  8. While potatoes are cooking, mix together all optional spices plus salt and pepper in a small bowl. (Although the peppers taste awesome with these extra spices, I have to admit sometimes on a VERY busy weeknight I omit these and the final product still turns out great!)
  9. Mix together all condiments in a small mixing bowl. Add extra of any of the condiments to adjust taste to your liking.
  10. Once potatoes are fork tender, add lentils and beef and onion mixture to the pan and mix.
  11. Add spice mixture and condiments to the beef mixture and cook on medium until the entire mixture is heated through.
  12. Load beef mixture into bell pepper halves and top each half with shredded cheese.
  13. Switch oven to broil and place bell peppers back in oven for 1-2 minutes or just until cheese is melted and slightly browned. ENJOY!

Nutrition

Per Serving: 593 calories; 16 g fat; 6 g saturated fat; 82 g carbohydrates; 16 g fiber; 38 g protein; 62 mg cholesterol; 661 mg sodium.

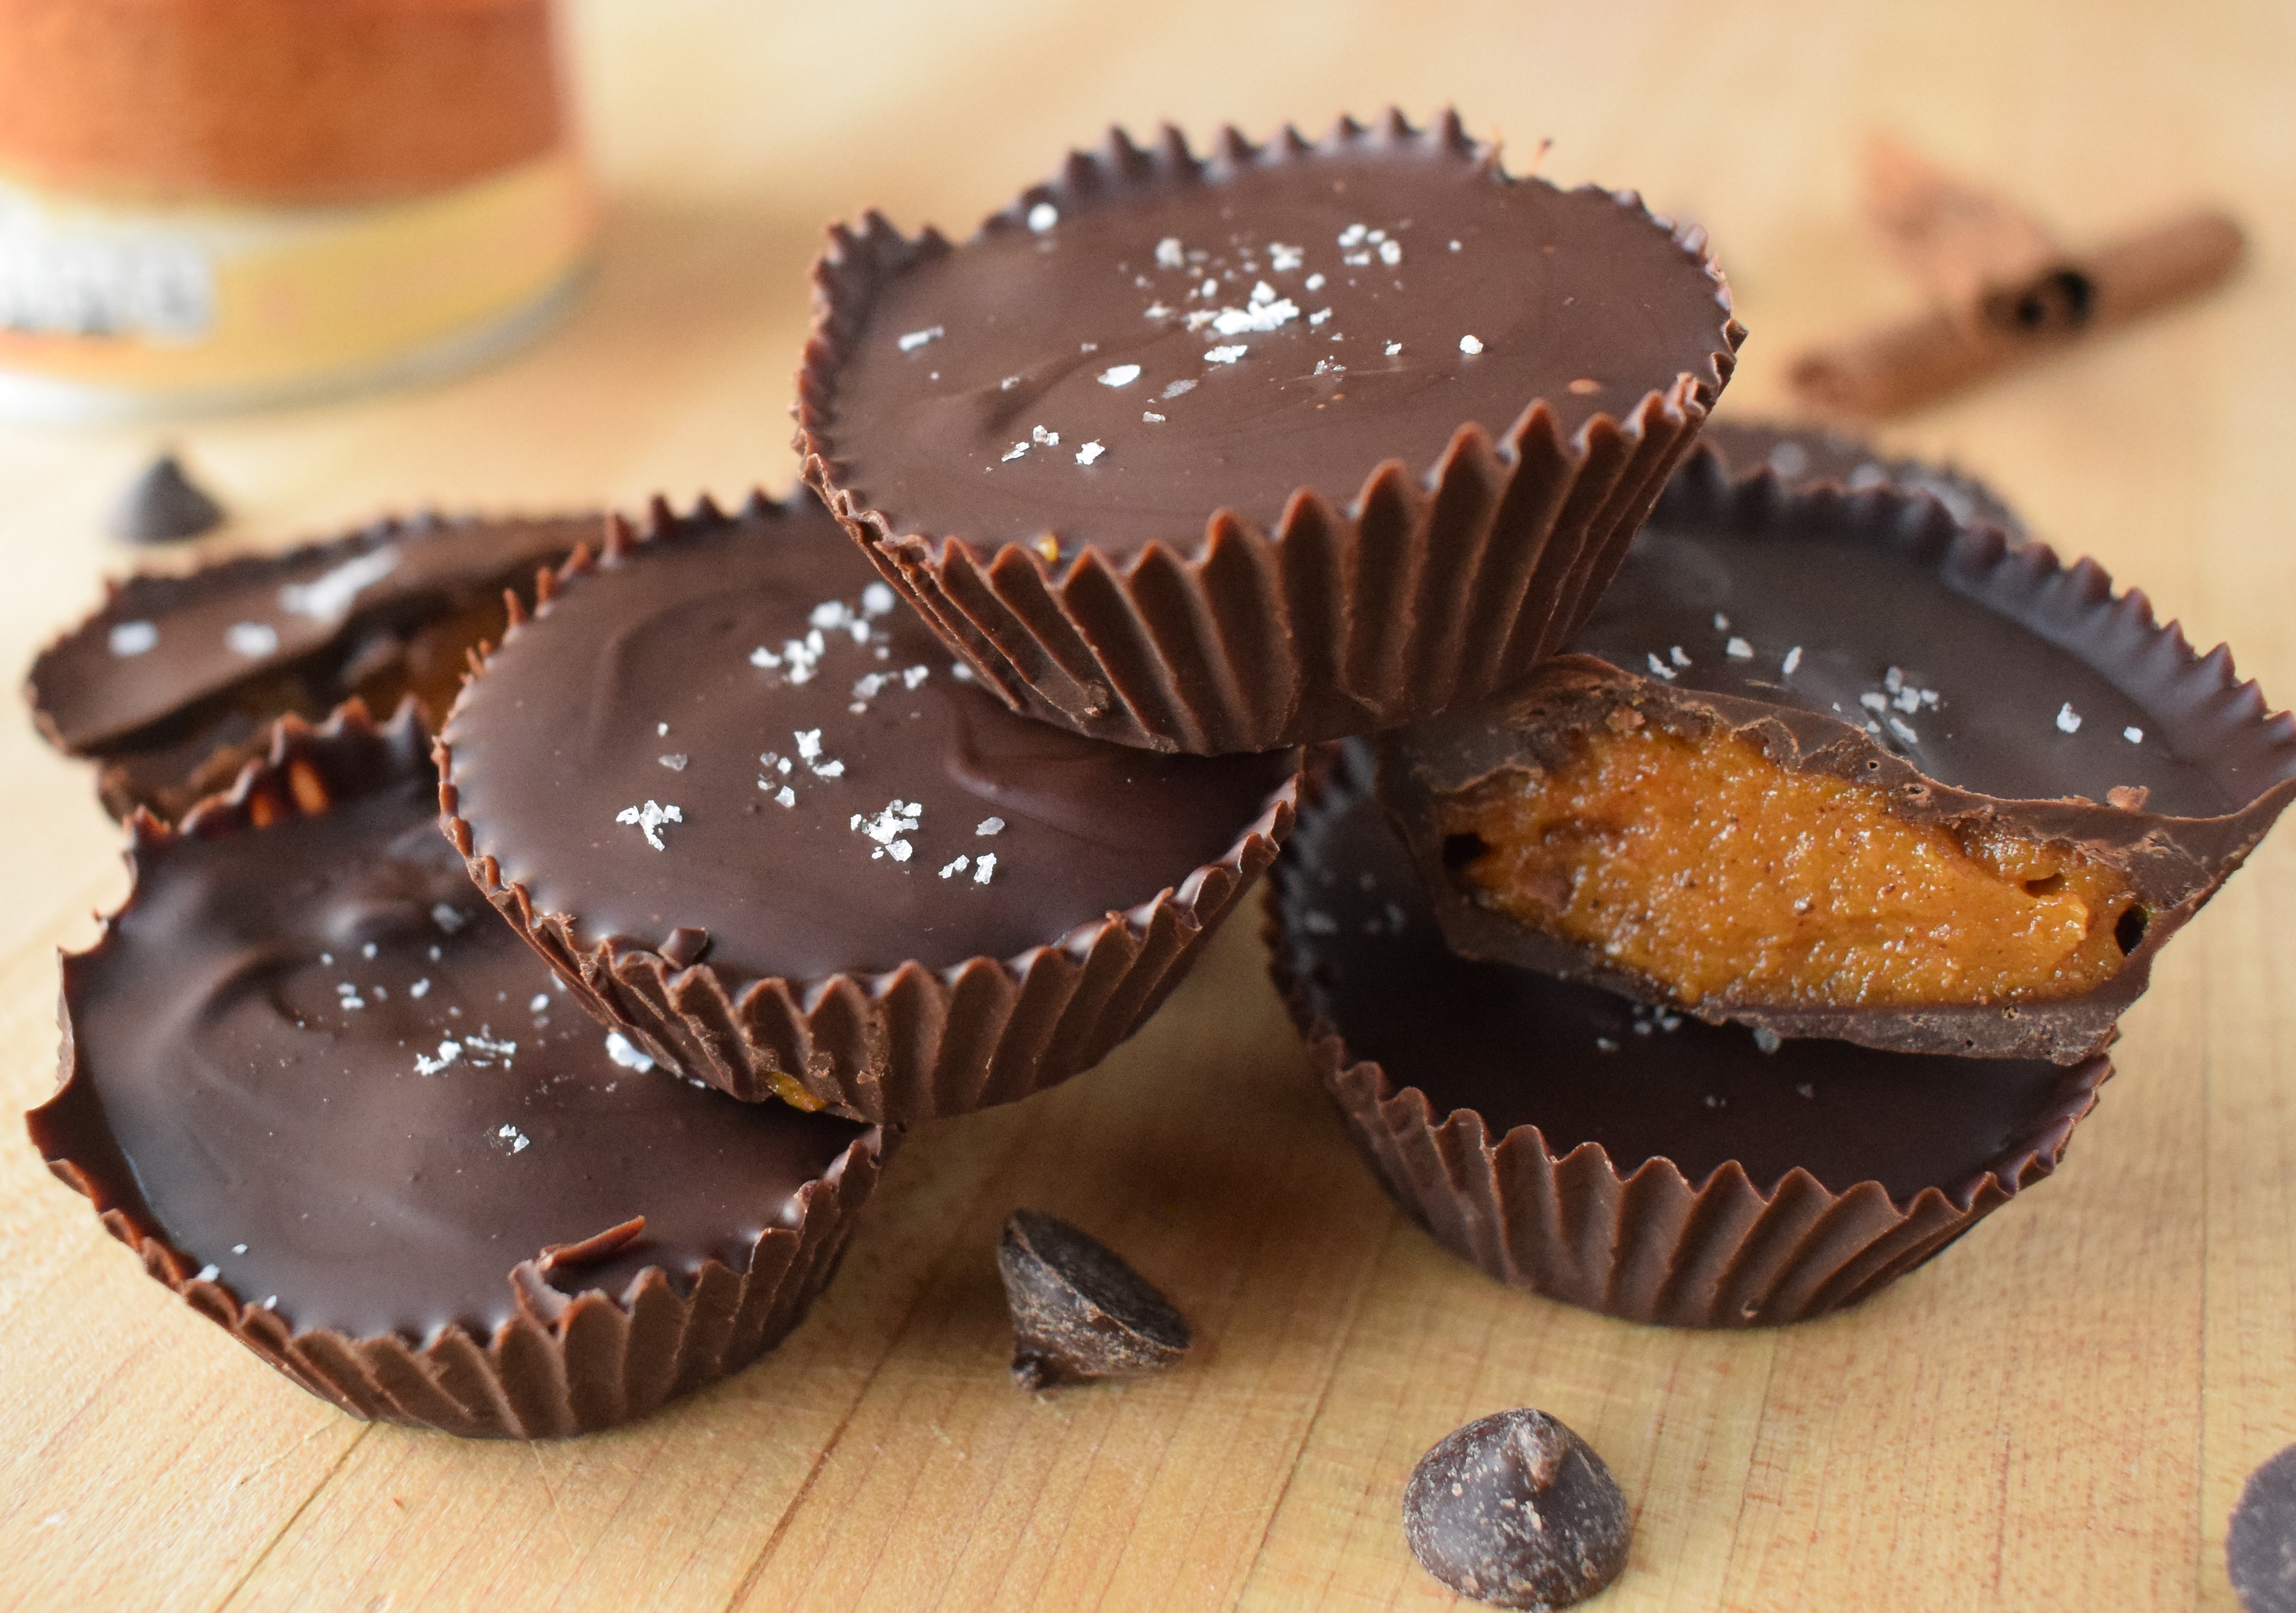
Vegan Dark Chocolate Pumpkin Cashew Butter Cups

Vegan Dark Chocolate Pumpkin Cashew Butter Cups

  • Servings: 10, 2 cups per person
  • Difficulty: easy
  • Print

A cozy fall treat.

Ingredients

  • 1.5 cups 70% dark chocolate chips
  • 1/4 cup pumpkin puree
  • 1/4 cup dark brown sugar
  • 1/4 cup cashew butter
  • 1/4 teaspoon cinnamon
  • 1/8 teaspoon nutmeg
  • 1/8 teaspoon ground ginger
  • 1/16 teaspoon (tiny pinch!) ground cloves
  • 20 mini cupcake liners (sizing really varies on this, the liners available at my local grocery store are a little taller and thinner than standard Reese’s peanut butter cups)

Directions

  1. Using a double boiler, melt the dark chocolate chips.
  2. Prepare the chocolate shells: Spoon a little bit of melted chocolate into each paper liner, then use the opposite end of a table knife (a chopstick or other small implement will also do!) to spread the chocolate half way up the sides of the liners. Place shells in the refrigerator to harden.
  3. Prepare pumpkin cashew butter: In a small bowl, mix together pumpkin puree, dark brown sugar, cashew butter, cinnamon, nutmeg, ground ginger, and cloves.
  4. Fill chocolate shells: Once chocolate lined paper cups have hardened, remove from the refrigerator and add a small amount of pumpkin cashew butter to each shell, swirling with the tip of a knife so the surface is relatively flat instead of mounded. The pumpkin butter should come about 3/4 of the way up the sides of the chocolate shells.
  5. At this time if the chocolate shells are starting to melt from the warmth of your hand you can place them back in the refrigerator for a few minutes to harden up – otherwise carry on to step 6!
  6. Top off the pumpkin cashew butter cups: Spoon the remaining melted chocolate on top of the cashew butter cups, and jiggle until the chocolate fills in all the cracks and meets the edges of the chocolate shells.
  7. Place in the refrigerator to harden. Optional: When the shells are halfway hardened, sprinkle with sea salt for garnish.
  8. Once the shells have hardened completely, remove the paper liners and enjoy! Once the liners are removed, the pumpkin cashew butter cups can be stored on the counter or inside the refrigerator.

Nutrition

Per Serving: 185 calories; 13 g fat; 6 g saturated fat; 15 g carbohydrates; 0 g fiber; 13 g sugars; 1 g protein; 0 mg cholesterol; 1 mg sodium.

No Fuss 60% Whole Wheat Sourdough Bread for Busy People

For a bread eating experience that is truly to die for, serve this bread with this Carrabba’s copycat olive oil dip!

No Fuss Whole Wheat Sourdough Bread

  • Servings: 8
  • Difficulty: easy
  • Print

A hearty yet fluffy all-purpose sourdough loaf.

Ingredients

  • 144 grams bread flour
  • 216 grams Bob’s Red Mill Stone Ground Whole Wheat Flour (Am I seriously telling you what brand of flour to use?! No, however if you use another brand you will likely need to use less water as other brands tend to have less fiber per serving and can’t tolerate quite as much hydration. Try around 270 grams of water and then adjust to your liking after you make your first loaf!)
  • 1 tsp salt
  • 210 grams 100% hydration sourdough starter
  • 288 grams water (If your starter is very runny I recommend experimenting with using less water)

Directions

  1. Mix together bread flour, whole wheat flour, and salt into a large mixing bowl and set aside.
  2. Into the bowl of a stand mixer, measure out your sourdough starter.
  3. Measure out your water, and microwave it until the water reaches 90 degrees F (or if your starter is fridge-cold heat water to 100 degrees F). Add the water to your starter and mix with a fork until starter is dispersed with very few clumps remaining.
  4. Add your flour mixture to the starter mixture and mix together until no dry flour remains. Cover and let sit 40-55 minutes.
  5. Using a dough hook attachment, kneed your dough on the lowest setting for 5 minutes. Don’t worry, the dough is supposed to look very sticky and will NOT pull away from the sides of the bowl!
  6. After 5 minutes, transfer your dough back to the bowl that originally held your flour mixture, cover, and let rest 1 hour and 30 minutes.
  7. Turn your dough: Wet your hand thoroughly, and then lift your dough and fold it back over onto itself. Do this 5 or 6 times, rotating the bowl and scraping the dough away from the edges with your fingers as you go. This is what we do for sourdough bread instead of kneading! Check out the link below the recipe for a great youtube video on how to turn sourdough. Again, the dough will be very wet and sticky at this point so don’t be concerned! You may feel the need to wet your hand more than once, and some dough will still stick to you and that’s ok! You should notice that by the 5th or 6th turn the dough has become much stronger. At this point cover the dough again and let rest another 1 hour and 30 minutes.
  8. Turn your dough again. Perform the same procedure outlined is step 7. At this point you may notice the dough is a little lighter and fluffier. I usually try to turn the dough just a little more gently this time so as not to squash out too many air bubbles.
  9. Cover the dough and let rest 2 hours.
  10. Shape your dough: Turn your dough out onto an un-floured work surface. Sprinkle the top of the dough with a generous amount of flour. Using a dough scraper turn the dough upside down so the floured side is against the counter. Use your thumb against the rest of your fingers to pinch the part of the dough that’s farthest away from you, pull it slightly farther away from you, and then fold it over onto itself toward the middle of the ball of dough. Repeat this with the part of the dough closest to you, and then with both sides. At this point, turn the dough upside down so the folds are facing the counter. At this point, cup your hands around the part of the ball of dough facing away from you, and gently pull towards yourself, developing tension along the top of the loaf. Repeat this motion how pulling the dough from left to right. Repeat these motions as few times as possible to develop a round loaf with a gentle tension on top. If the dough rips, you developed too much tension! No worries. Simply stop shaping and use less tension next time. I’ve provided a youtube link below on how to shape sourdough bread, as I’ve found personally that watching helps a lot more than reading!
  11. Sprinkle flour in your banneton, and then using the dough scraper lift the loaf from the counter top and place it smooth side up (counter side down) in your banneton. Cover with a light lint free cloth and let rest 40 minutes to an hour.
  12. Preheat your dutch oven: While the dough is doing it’s final rest, place your dutch oven in the oven and preheat to 500 degrees F.
  13. Once your shaped loaf is done resting, remove your dutch oven from the oven, remove the lid, and gently turn your loaf out into the bottom of the dutch oven. Due to the orientation of the dough in the banneton, scoring is not necessary although you may score the bread at this time if you wish! Do this quickly and then cover the dutch oven immediately and place it back in the oven for 16 minutes.
  14. Uncover the dutch oven and bake for 12 more minutes.
  15. Remove bread from oven to a cooling rack and ENJOY!!

Nutrition

Per Serving: 210 calories; 1 g fat; 0 g sat fat; 42 g carbohydrates; 5 g fiber; 9 g protein; 0 mg cholesterol; 291 mg sodium.

Click below for a great youtube video on turning sourdough!

Click below for a video on shaping sourdough. I recommend only watching from 0:58 to 1:49. In the beginning of the video this baker chooses to de-gas her loaf by pressing some of the air bubbles out. I personally don’t recommend that as I like to see as many air bubbles as possible in my bread! Additionally, note that our loaf is far more hydrated than hers so it won’t sit up quite as high after the shaping and that’s ok. 🙂

Chickpea Walnut Burgers with Whipped Feta and Balsamic Roasted Veggies

Chickpea Walnut Burgers with Whipped Feta and Balsamic Roasted Veggies

  • Servings: 3-4 Burgers
  • Difficulty: easy
  • Print

A hearty vegetarian dinner for any day of the week!

Ingredients

    For the Chickpea Patties:
  • 2.5 Tablespoons ground flaxseed
  • 6 Tablespoons warm water
  • 1/2 cup walnuts or almonds
  • 1 15oz can drained and rinsed chickpeas
  • packed 1/4 cup roughly chopped fresh parsley
  • 3 garlic cloves
  • heaping 1/2 teaspoon lemon zest
  • red pepper flakes to taste
  • salt and pepper to taste
  • 1/2 cup gluten free breadcrumbs (or whole wheat if not gluten free)
  • 3-4 gluten free hamburger buns (or whole wheat if not gluten free)
  • For the Balsamic Roasted Veggies:
  • 3 roma tomatoes
  • 1/4 large red onion
  • drizzle of oil (I use grapeseed oil)
  • 1-2 Tablespoons fresh thyme leaves, taken off the stem but not chopped (or 1/2-1 tsp dried thyme)
  • salt and pepper to taste
  • 1/2 cup balsamic vinegar
  • For the Whipped Feta:
  • 1 cup plain feta crumbles
  • 1/4 cup plain nonfat greek yogurt
  • 1/4 cup mayonnaise
  • 1/8 tsp onion powder
  • 1/8 tsp garlic powder
  • salt and pepper to taste (I usually use a good amount of pepper and very little salt because feta cheese is already salty!)

Directions

  1. Preheat the oven to 450 degrees F.
  2. Prepare the flax egg: mix flax seeds and water in a small mixing bowl and set aside to thicken.
  3. Prep the roasted veggies: Slice the roma (plum) tomatoes lengthwise into quarters, and the onion into 1/2 inch-thick half moon slices. Remove thyme leaves from their stems.
  4. Place the tomatoes and onions on a silpat or parchment-lined baking sheet. Drizzle the veggies with your cooking oil of choosing, and lightly brush the oil around the veggies with your hand. Sprinkle veggies with thyme, salt, and pepper.
  5. Make the the chickpea patties: Place the walnuts in the bowl of a food processor and process until walnuts resemble coarse crumbles. Do not over process, as the crumbles will continue to get smaller when the chickpeas are added.
  6. Add the chickpeas, parsley, garlic, lemon zest, red pepper flakes, and salt and pepper to the food processor and pulse just a few times until the chickpeas are broken up and some of them have formed a thick paste.
  7. Remove the chickpea mixture from the food processor and add the flax egg and breadcrumbs and mix by hand until both are fully incorporated.
  8. Form mixture into patties and place on parchment or silpat-lined baking sheet.
  9. Bake the patties and roast the veggies: Place both the prepped veggies and chickpea patties into the preheated oven and bake for 25 minutes.
  10. Make the balsamic reduction: Place the balsamic vinegar in a small saucepan and place over medium or medium-low heat on the stove. Allow the vinegar to simmer and evaporate until the volume is cut in half. Sometimes I even reduce it a little more to about a third of the volume if I’m after a sweeter taste or thicker consistency!
  11. Prepare the whipped feta: Wash out your food processor, and then place all ingredients for the whipped feta inside. Blend for at least 1-2 minutes or until mixture is smooth and spreadable.
  12. Assemble the burgers: When the veggies and burgers are done baking, place a chickpea patty on a bun (gluten free if needed), and top with whipped feta, roasted veggies, and balsamic reduction. Enjoy!

Nutrition

*Nutrition calculations assume this recipe yields 3 burgers, and is calculated for chickpea patties only, as topping use is variable. Per Serving: 456 calories; 18 g fat; 1 g sat fat; 61 g carbohydrates; 14 g fiber; 19 g protein; 0 mg cholesterol; 600 mg sodium.

Rosemary Thyme Zucchini Tots with Truffle Aioli Dipping Sauce

Rosemary Thyme Zucchini Tots with Truffle Aioli Dipping Sauce

  • Servings: 2-3
  • Difficulty: easy
  • Print

A delicious appetizer or veggie side dish for any meal.

Ingredients

    For the Tots:
  • 1.5 cups packed shredded zucchini
  • 3/4 cup gluten free breadcrumbs (or whole wheat bread crumbs if not gluten free)
  • 1/2 heaping cup grated parmesan cheese
  • 1 egg, whisked
  • 1 Tablespoons chopped fresh rosemary
  • 2 teaspoons chopped fresh thyme
  • 1 chopped garlic clove
  • 1/4 teaspoon salt, or more to taste
  • pepper to taste
  • For the Aioli Dipping Sauce:

  • 1/4 cup plain greek yogurt
  • 1/4 cup mayonnaise
  • 2 teaspoons truffle oil
  • 1 teaspoon lemon juice
  • 1/4 teaspoon garlic powder
  • salt and pepper to taste

Directions

  1. Preheat oven to 400 degrees F.
  2. Combine all ingredients for the zucchini tots in medium sized mixing bowl.
  3. Form oval shaped tots about 1.5 inches long, squeezing out any excess water with your hands. Place tots on parchment or silpat lined baking sheet.
  4. Bake tots for 15 minutes, then flip and bake 10 minutes more.
  5. While the zucchini tots are baking make the aioli dipping sauce. Combine all sauce ingredients in a small bowl and mix until incorporated.
  6. Let tots cool 5-10 minutes before serving. Enjoy!
  7. Note: these zucchini tots also pair well with a simple marinara dipping sauce!

Nutrition


Note: These nutrition facts assume this recipe makes 3 servings and are calculated only for the zucchini tots themselves, without the dipping sauce.
Per Serving: 197 calories; 10 g fat; 6 g saturated fat; 13 g carbohydrates; 2 g fiber; 15 g protein; 89 mg cholesterol; 504 mg sodium.

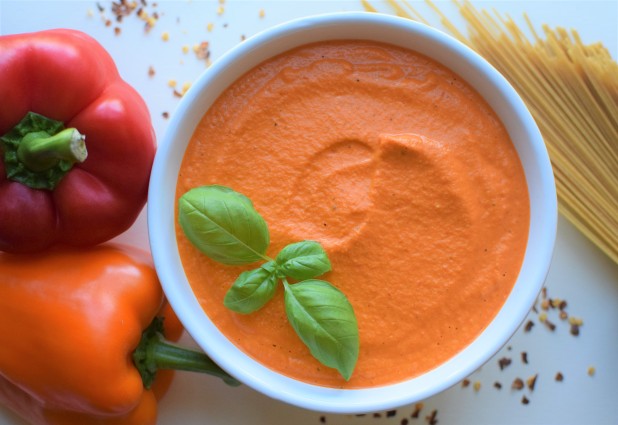
Creamy Vegan Roasted Red Pepper Pasta Sauce

Creamy Vegan Roasted Red Pepper Pasta Sauce

  • Servings: 4
  • Difficulty: easy
  • Print

A simple and delicious no-cook sauce recipe.

Ingredients

  • 1 cup jarred sliced roasted red peppers with 2-3 Tbsp of the water from the jar
  • 2 small cloves garlic
  • 1/2 cup raw cashews (these should be soaked in water overnight or soaked in boiling hot water for 5-10 minutes)
  • 1 cup frozen cauliflower, thawed in the microwave
  • 1 Tablespoon nutritional yeast
  • 2 teaspoons red wine vinegar
  • mounded 1/2 teaspoon salt
  • pepper to taste

Directions

  1. Add the roasted red peppers with their water, garlic, and cashews to a blender. Blend until smooth.
  2. Add frozen cauliflower, nutritional yeast, red wine vinegar, salt and pepper to the blender and blend until smooth. Add more water from the roasted red pepper jar or a vegan milk substitute if a thinner consistency is desired. The cashews will thicken the sauce over time, so if you plan to save the sauce for another day, reheat and add a little more water or vegan milk substitute to thin to desired consistency before enjoying on your favorite pasta!
  3. Serve over piping hot pasta!

Nutrition

Per Serving: 106 calories; 6 g fat; 1 g sat fat; 9 g carbohydrates; 2 g fiber; 4 g protein; 0 mg cholesterol; 420 mg sodium.

Matcha Chia Bowl

Matcha Chia Bowl with Strawberry and Coconut

  • Servings: 1
  • Difficulty: easy
  • Print

A quick breakfast packed with protein and fiber.


Ingredients

  • 1/2 cup plain greek yogurt
  • heaping half teaspoon matcha powder
  • 2 teaspoons honey
  • 1/4 cup fully hydrated chia seeds (you can prepare this by adding 3.5 Tablespoons water to .5 Tablespoons chia seeds, and letting the mixture sit 5 minutes or until thick. I usually prepare this is 1-2 cup batches and refrigerate for later use!)
  • chopped strawberries, sliced almonds, and shredded coconut for topping (optional)

Directions

  1. In a small bowl mix together yogurt and matcha until no matcha clumps remain.
  2. Add honey to yogurt mixture and stir until fully combined.
  3. Mix hydrated chia seeds into yogurt mixture
  4. Top matcha bowls with chopped strawberries, sliced almonds, and shredded coconut. Enjoy!

Nutrition

Per Serving: 333 calories; 30 g fat; 23 g carbohydrates; 18 g protein; 4 g fiber; 7 mg cholesterol; 40 mg sodium.